Create a Group
Written By Reshma Kader
Last updated About 2 months ago
Group Management Overview
Creating a Group is an easy way to keep track of students. Groups can be organized any way you choose, such as class sections, grade levels, differentiated small groups, etc.
Groups can contain students and staff across multiple licenses. It is important to remember the following:
You can only add, remove, or edit students and staff in a group with whom you share a license.
Students or staff with whom you do not share a license will be greyed out when viewing a mixed license group. In other words, these members are View Only.
Staff members who are group members cannot be assigned a Lesson or an Assessment.
Shared Groups
A group can be shared across a license.
If you are sharing a mixed group (i.e., users from multiple licenses):
Staff on your license can view the entire group.
Staff can only assign a Lesson or an Assessment to users within that group with whom they share a license. Group members on a different license will not receive the assignment.
Create a Group
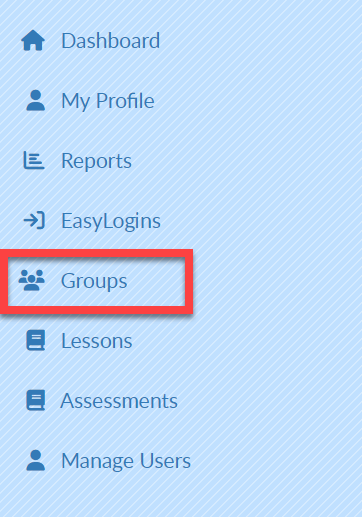
Select Groups on the left menu.
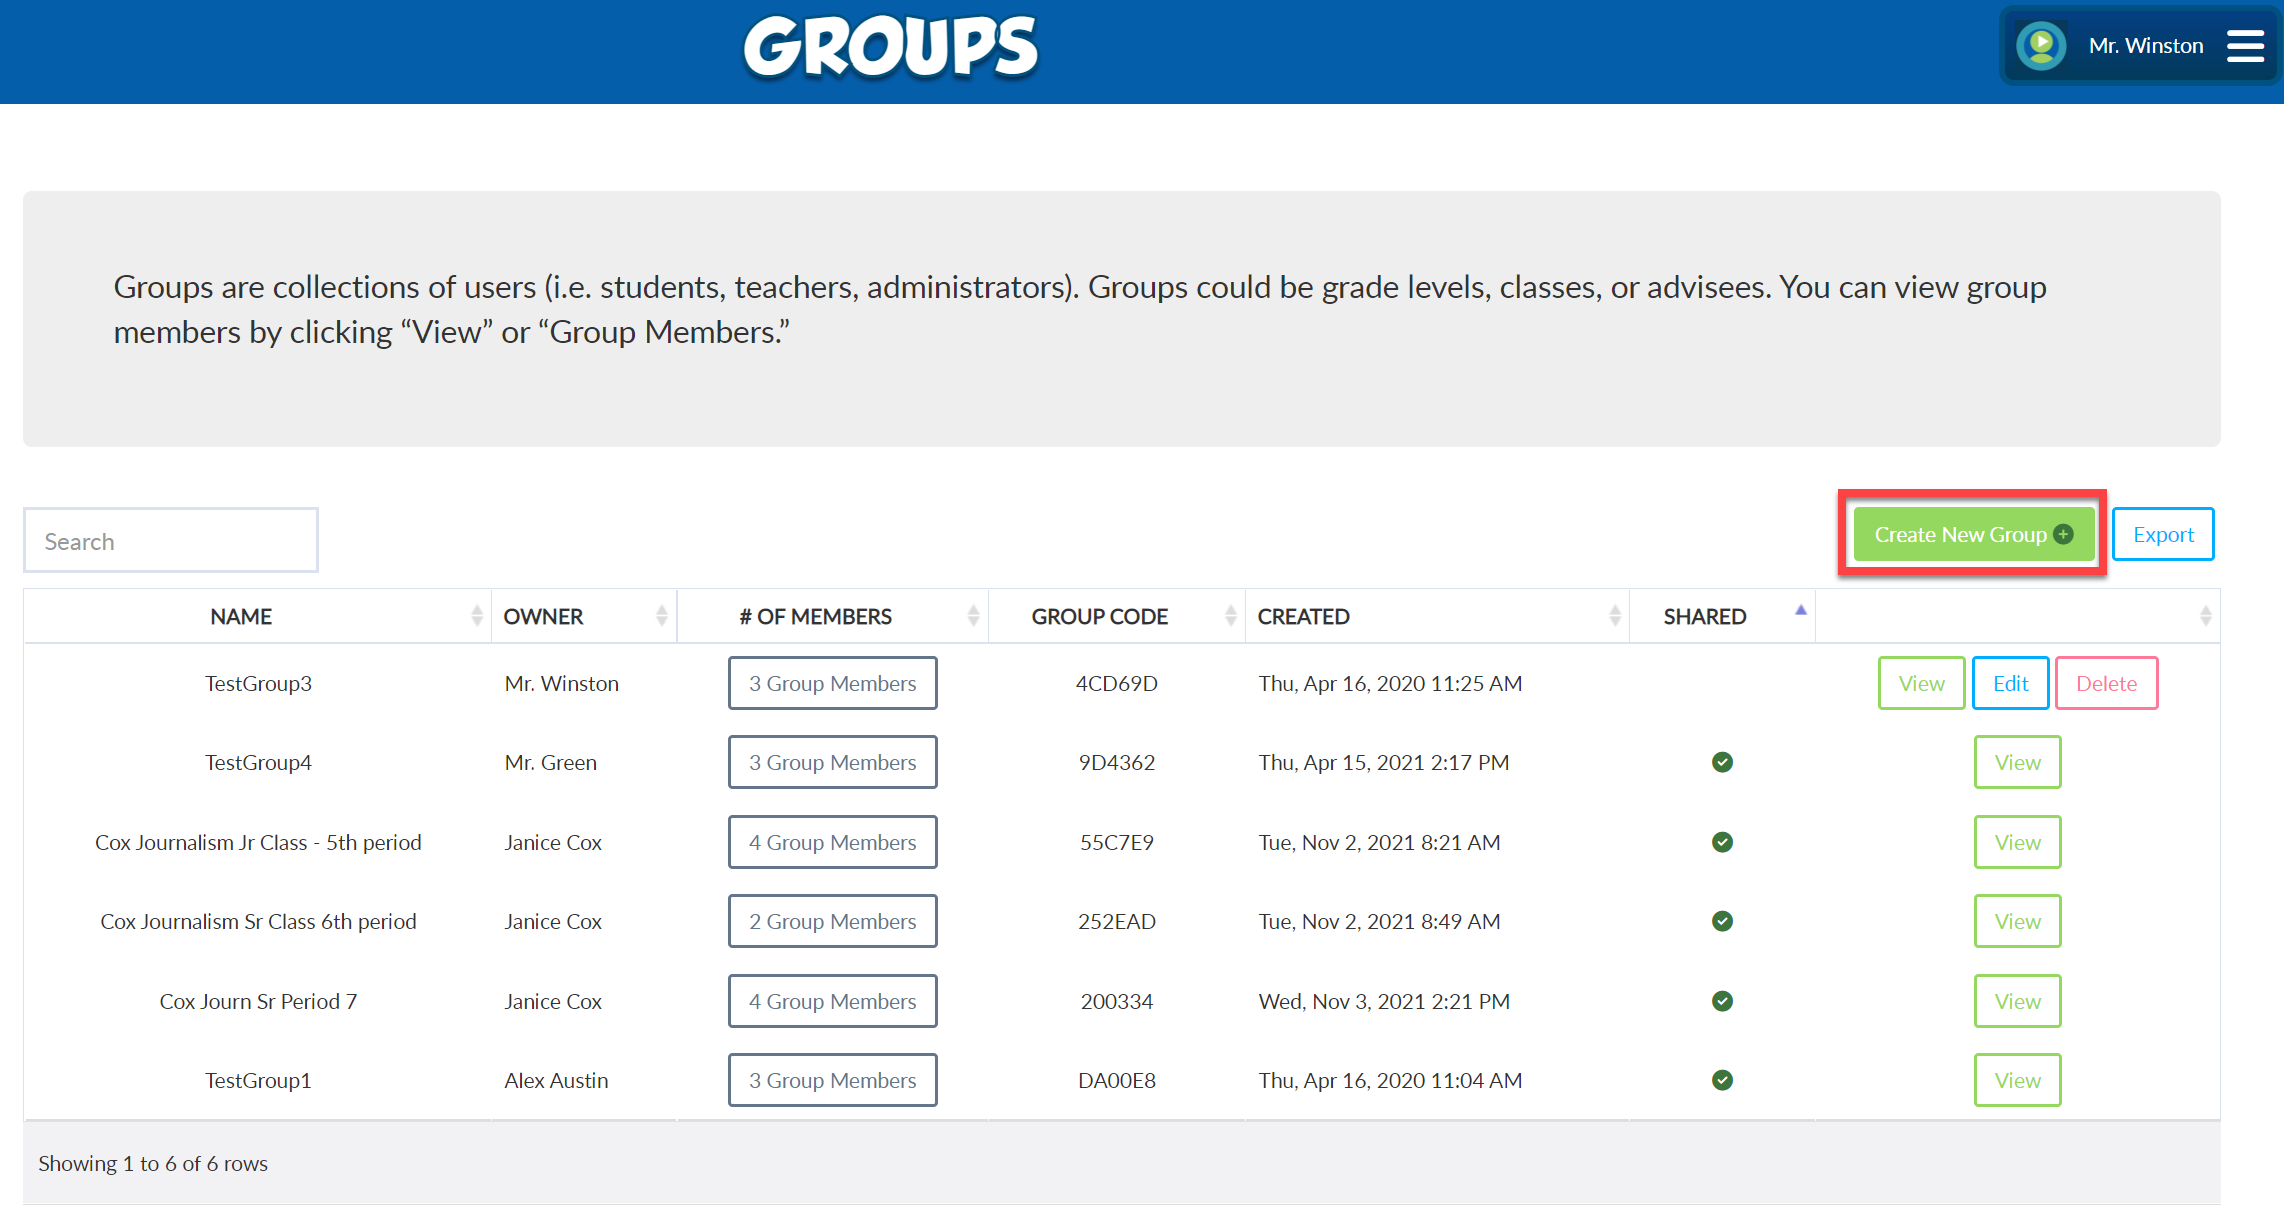
Select Create New Group.
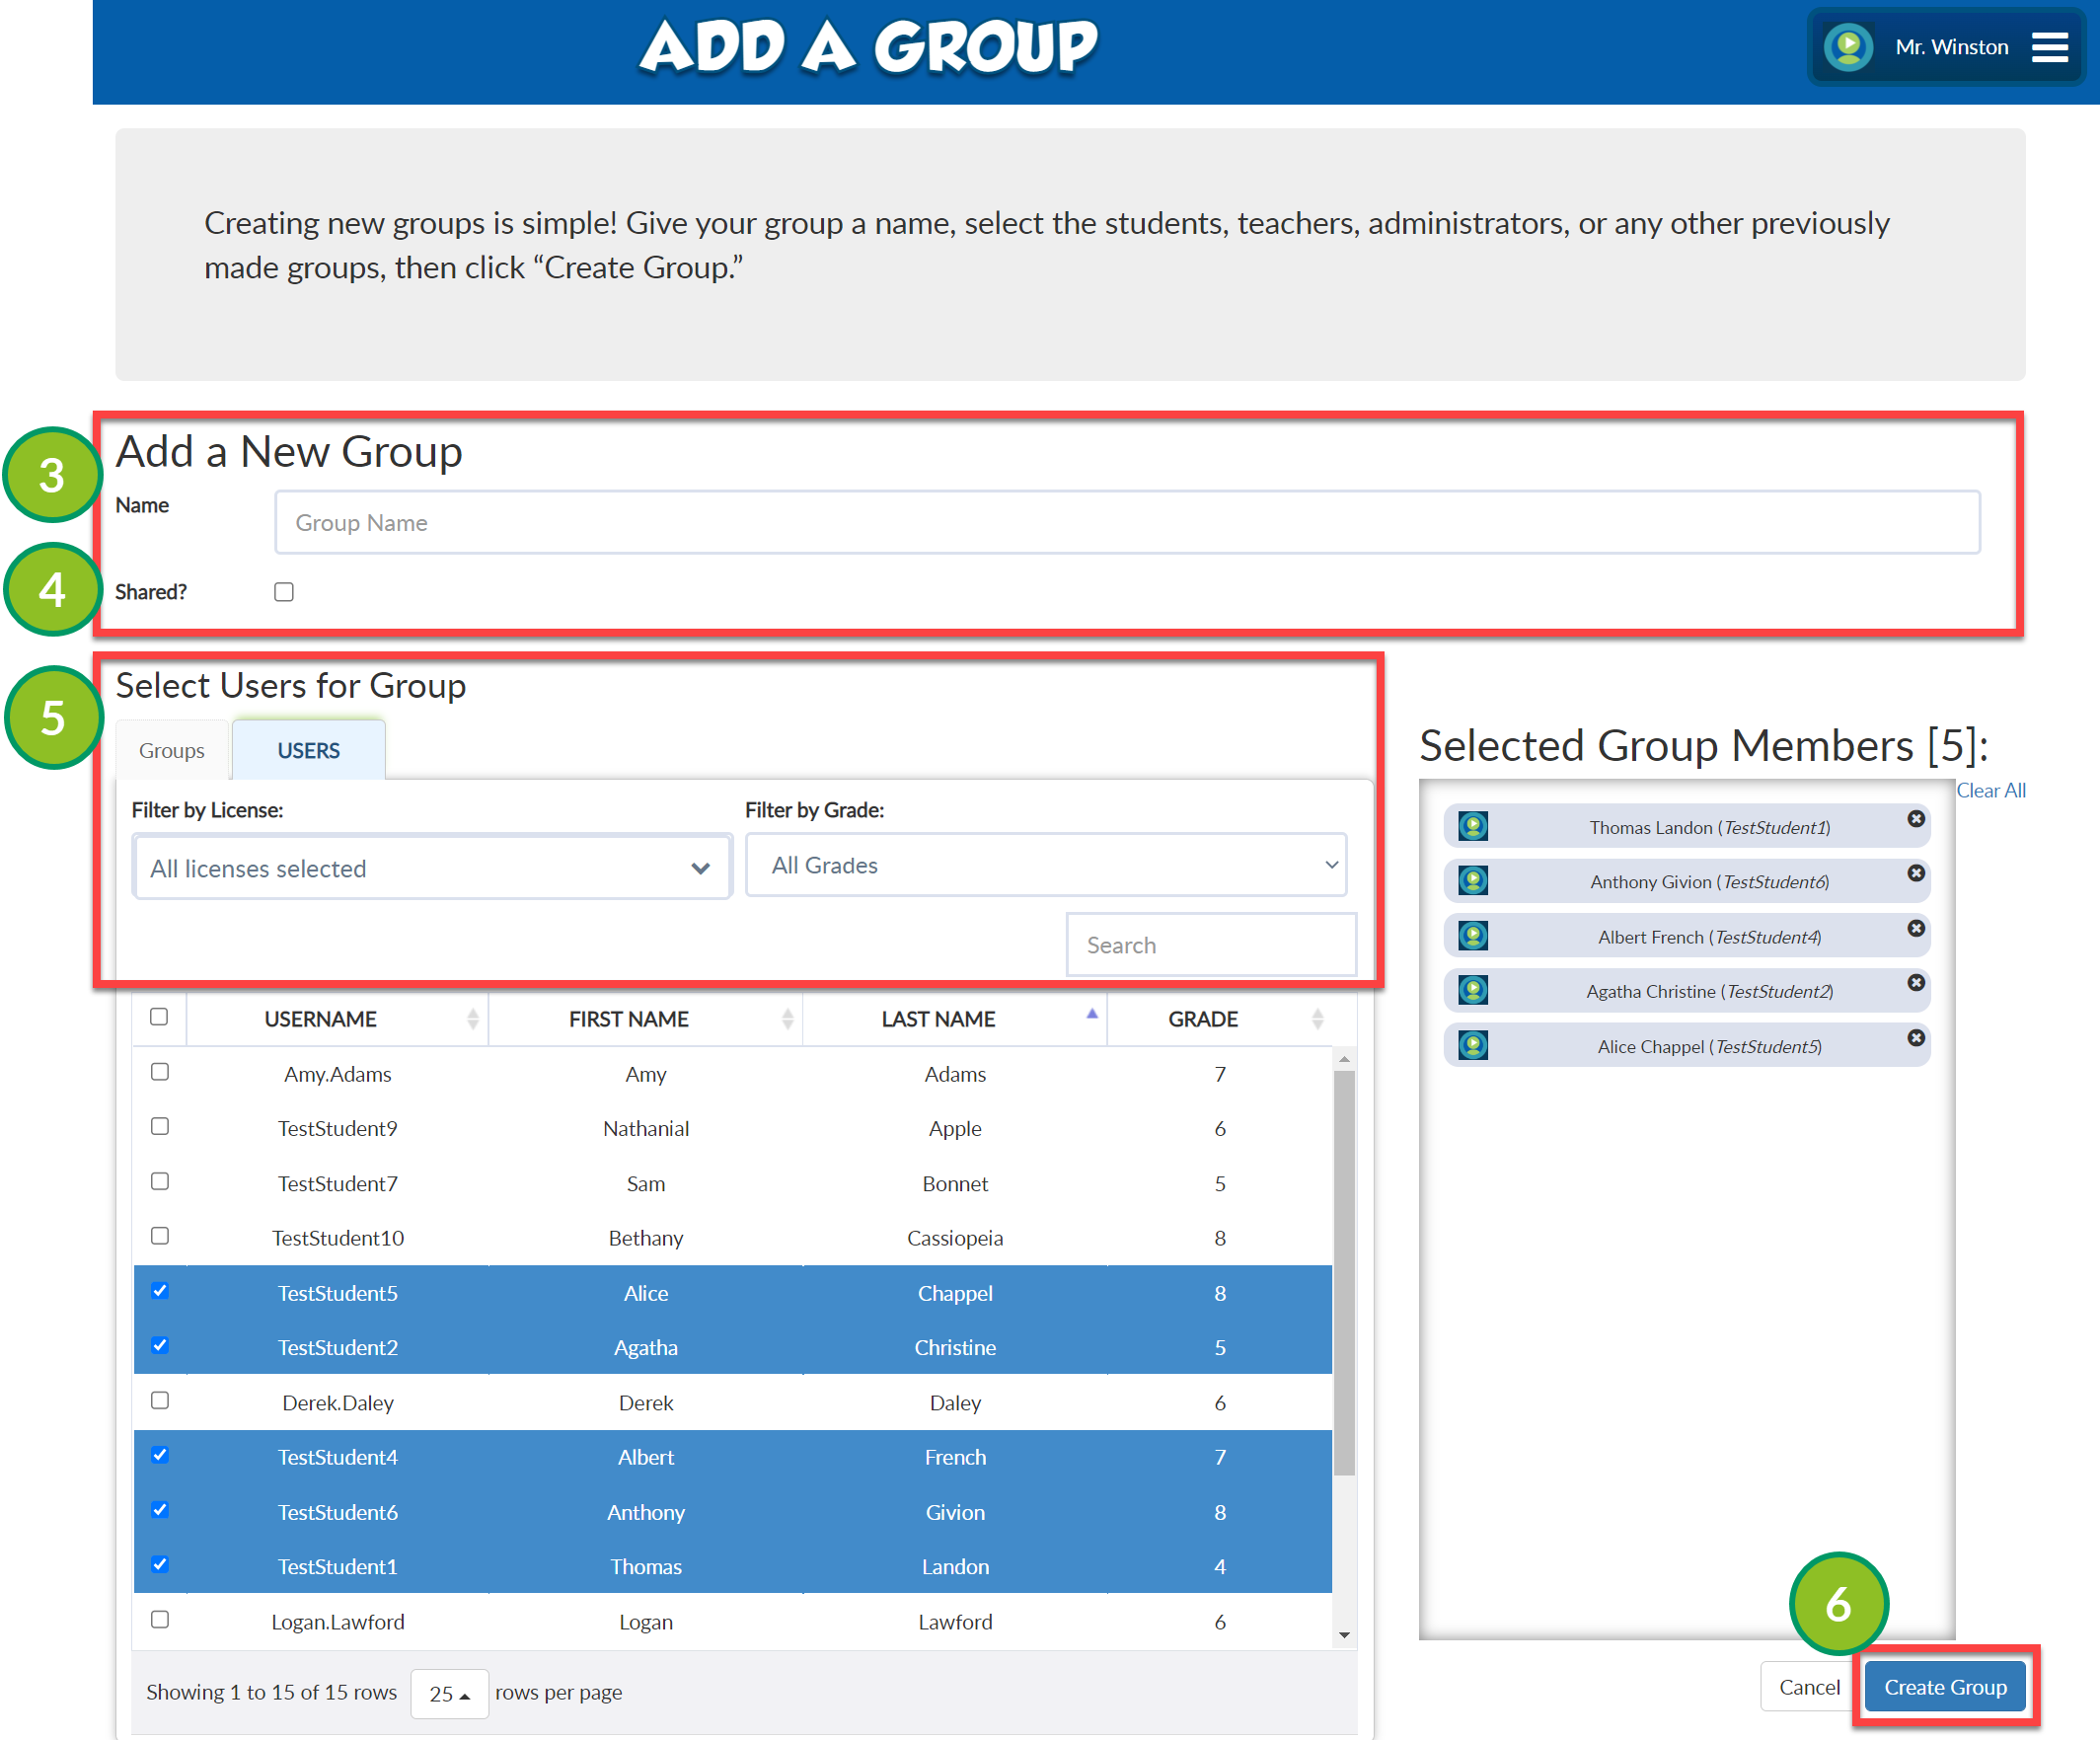
Add a Group Name.
Select the Shared checkbox to share this group with others on your license.
Select Users for the Group
From the Users tab, select the checkbox next to the desired student's name.
From the Groups tab, select the checkbox next to the desired Group name.
Use the Filter by License and Filter by Grade drop-down menus to filter your search or type directly into the Search box.
Once all of the desired students have been selected, select Create Group.