Overview of Groups Management
Written By Reshma Kader
Last updated About 2 months ago
Important Facts about Creating Groups
Creating a Group is an easy way to keep track of students. Groups can be organized any way you choose, such as class sections, grade levels, differentiated small groups, etc.
Groups can be created and shared across multiple licenses. A license is generally defined as a location (i.e., a school, a district, or an agency). Examples of shared Groups:
A teacher teaches in more than one location and may have access to more than one license.
A student learns in more than one location and may be given assignments across multiple licenses (i.e., from multiple teachers).
Team teaching occurs across different licenses, such as across a school district.
A district can build Groups across licenses and then generate reports specific to that Group (i.e., ESL students across a district).
In a multi-license, shared Group:
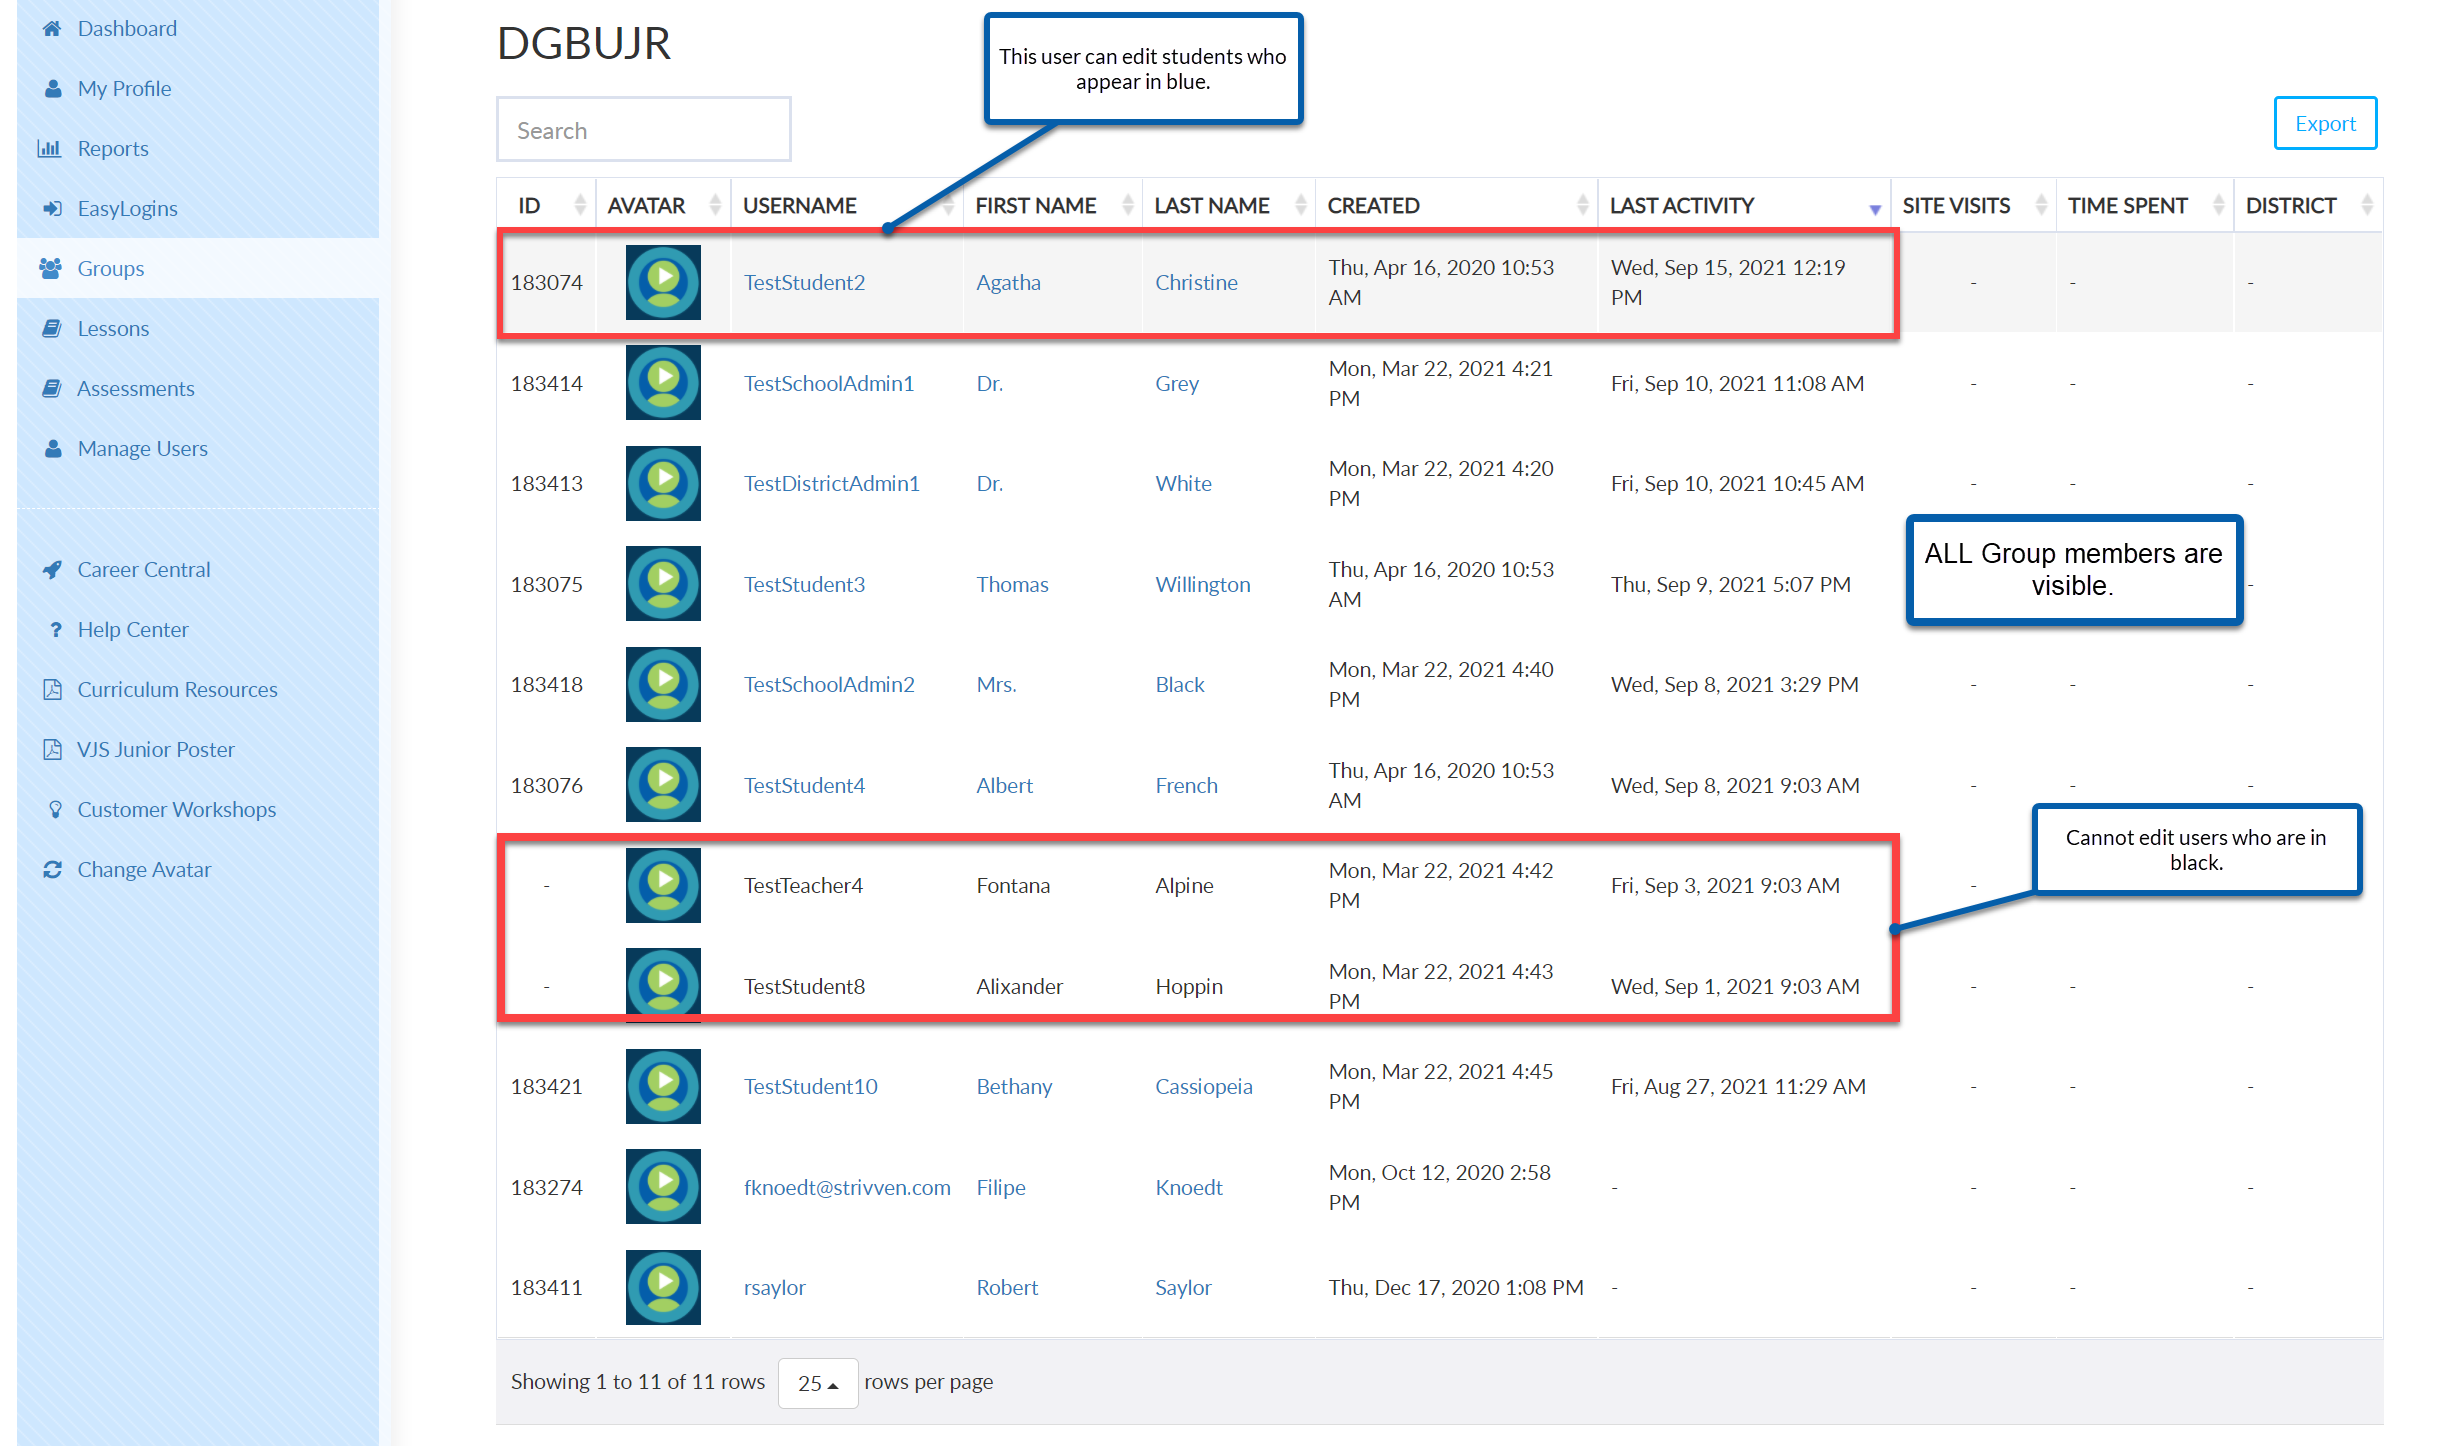
You can see a list of all of the members in that Group.
Group members with whom you do NOT share a license will be grayed out.
You can only edit, remove, and assign Lessons to the Group members with whom you share a license.
When assigning a Lesson to a Group, only users (i.e., students) will receive the assignment, not staff nor admin group members.
Teachers can view other teachers' groups but not edit.
District Admins and School Admins can edit a Group and add/remove students with whom they share a license.
Example
Mr. Winston is the logged-in staff user.
He can edit the Group that he owns.
He can view other groups created by other users with whom he shares a license.
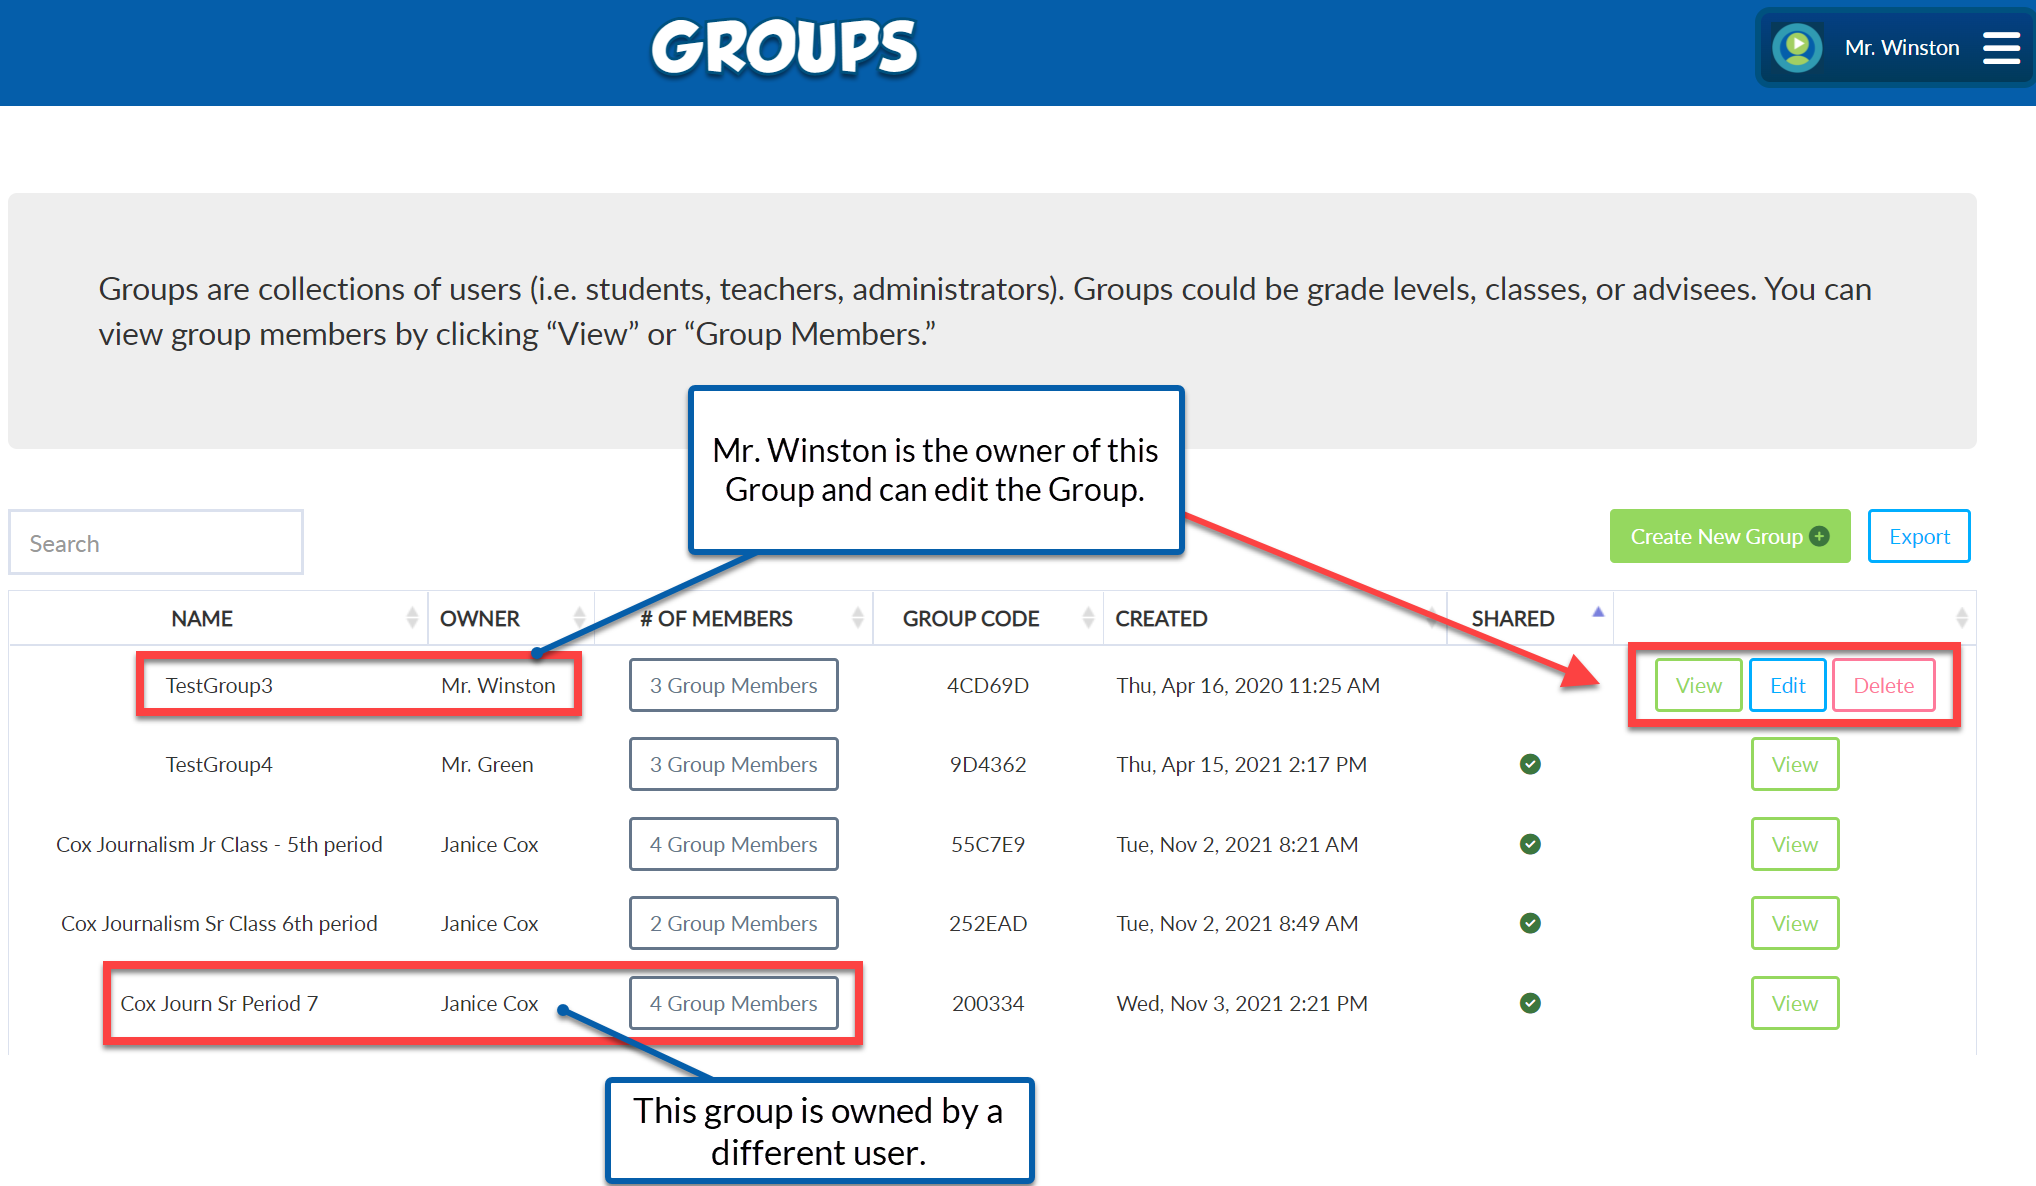
If Mr. Winston clicks on the Group owned by Janice Cox, he can see all of the Group members.
However, he can only edit (i.e., click on) the group members with whom he shares a license.